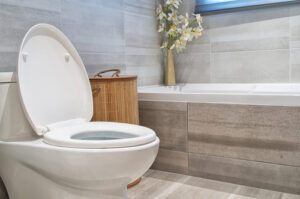
If you are not familiar with toilet parts, one of the first things you want to do is to identify the flapper. If you take the lid off, and make sure to set it somewhere safe, you can see several parts inside the tank. One of the parts you’ll see is a sort of hinged flap made of both plastic and rubber. This piece is connected to a chain that hangs down from the flush handle lever. This piece is your flapper!
Whenever you hear the water continuing to run after you’ve flushed it, the flapper is usually the culprit. The flapper seals a valve that is opened when you press the handle and water flows down into the toilet bowl. After a while, the rubber of the flapper tends to harden, which prevents the flapper from sealing the valve properly and water continues to run. Replacing the flapper is about a five-minute job.
- TURN OFF THE WATER
Locate the shut-off valve, located near the floor towards the back of the toilet. Turn the handle clockwise until it stops, to shut the water supply off. Next, flush the toilet to drain the tank. Sometimes you may have to hold the handle down until most of the water is out of the tank. - TAKE OUT THE OLD FLAPPER
Find the small clip on the top part of the chain that connects the flapper to the flush handle. Undo the clip and let the chain drop, as you’ll be replacing this part along with the flapper. Next, slide the sides of the flapper off the pegs that extend from the sides. (Note: On a plastic flapper, the sides will snap loose. On a rubber flapper, the sides will slide off the pegs.) - PREP THE NEW FLAPPER
Your new flapper may come with a plastic ring attached to the back of it. If your old one attached to the pegs on the sides, you can cut this piece off, as you won’t need it. If your flush valve doesn’t have the side pegs, you will need the ring that came with the new flapper to place over the overflow tube. - INSTALL THE NEW FLAPPER
Put your new flapper into place and hook each ear of the flapper to the pegs of the flush valve. Connect the chain back to the handle lever and adjust the length as needed. The chain should be relaxed when the handle is in its normal position. Make sure the chain is not too tight, as this can prevent the flapper from sealing the valve properly. - TEST IT
Now it’s time to test it! Turn the water back on by turning the shut-off valve again. Perform a couple of test flushes and watch the flapper move up and down to ensure it is functioning properly.
Congratulations! You’ve successfully replaced your flapper!
We provide professional plumbing services for residential, commercial and industrial clients throughout Southern Florida. We provide fast response time, competitive rates, and reliable service. Need A Plumber? Schedule an appointment today and call us at 954-445-6443 or use our contact form.

